Introduction

In today’s digital landscape, tracking and analyzing website and app data is crucial for businesses to make informed decisions and optimize their online presence. Google Analytics 4 (GA4) is a powerful analytics platform that provides valuable insights into user behavior, conversions, and marketing effectiveness. Setting up a GA4 property is the first step toward harnessing the full potential of this platform. In this article, we will guide you through the process of configuring your GA4 property using the Setup Assistant, highlighting its benefits and the step-by-step procedure.

Accessing Google Analytics and GA4 Property

Accessing Google Analytics and GA4 Property
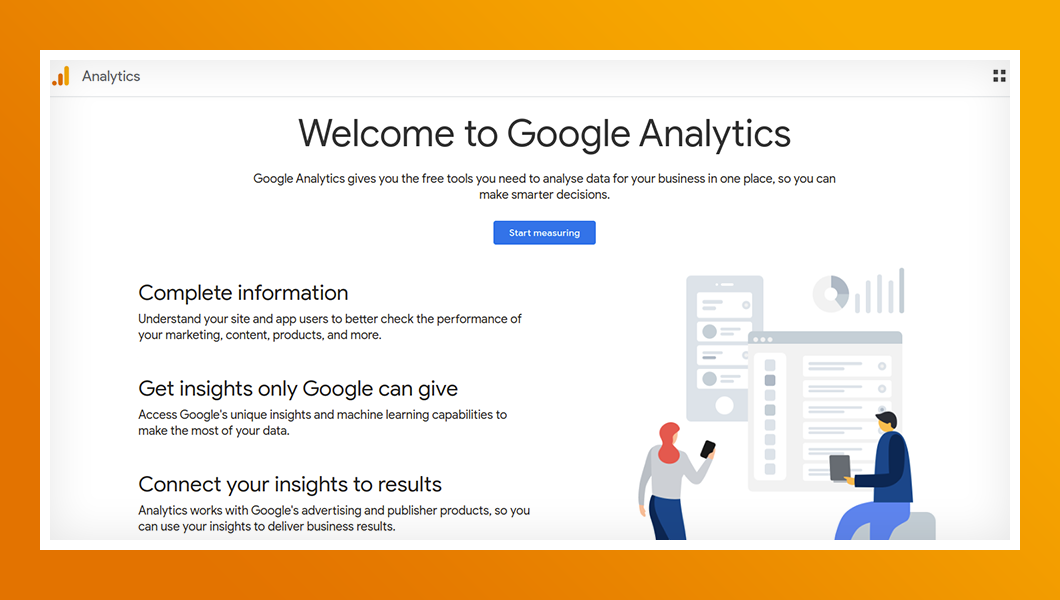
To begin configuring your GA4 property, you first need to access the Google Analytics platform. Open your web browser and navigate to analytics.google.com. Sign in with your Google account credentials.
Once logged in, you have two options for setting up a GA4 property. You can either create a new property specifically for GA4 or upgrade an existing Universal Analytics property to GA4. If you choose to upgrade, carefully review the implications and back up your Universal Analytics data before proceeding.
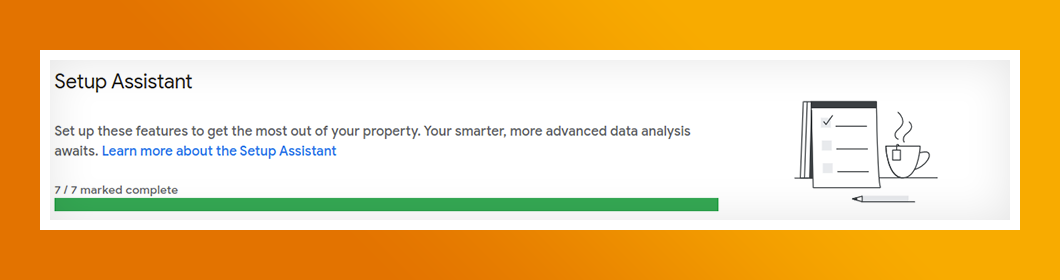
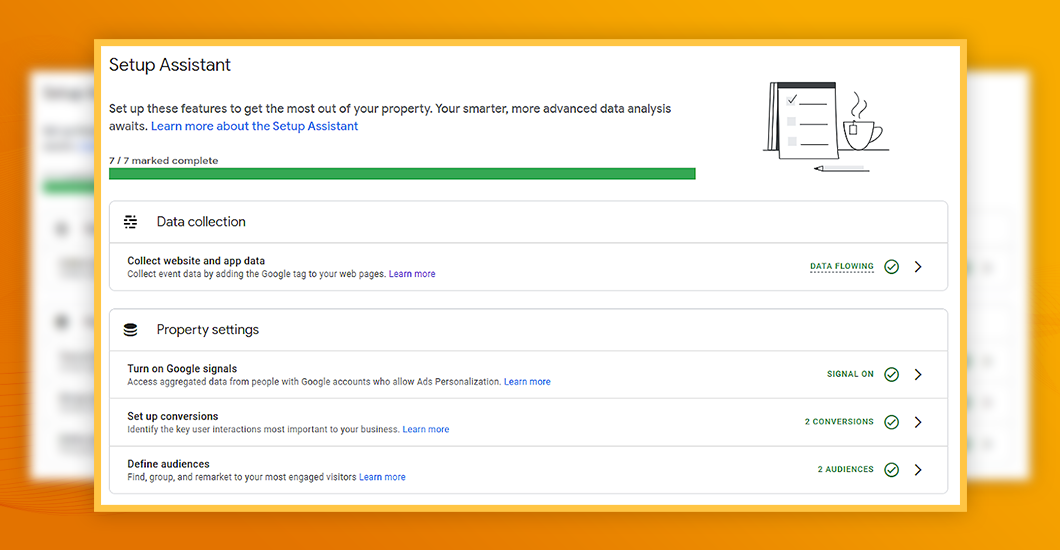
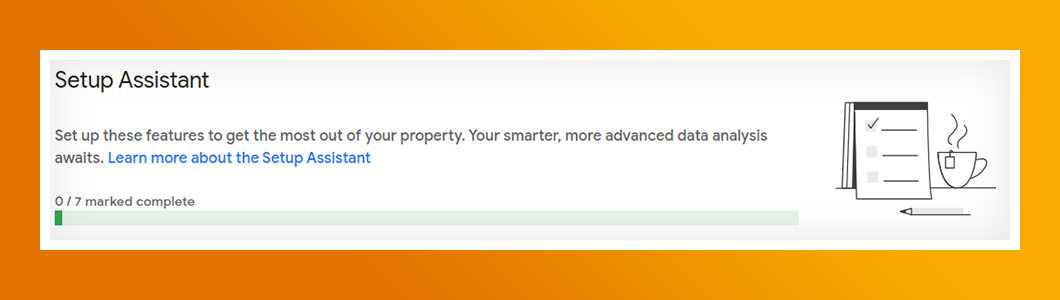
The Setup Assistant is a valuable tool Google Analytics provides to guide users through the configuration process. It breaks down the setup into manageable sections and steps, making it easier to understand and implement the necessary configurations.
The sections in the Setup Assistant include Data Collection, Property Settings, Google Ads Integration, and Advanced Setup (optional). Each section focuses on specific aspects of the GA4 configuration process, ensuring a comprehensive setup.

incomplete setup assistant

Step-by-Step Configuration Process

A) Data Collection:

The first step in configuring your GA4 property is to set up data collection for your website and app. It allows you to gather valuable insights into user behavior and engagement across different platforms.

collect website and app data

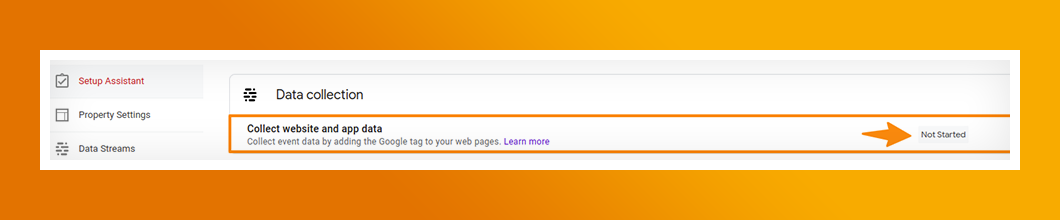
Let’s explore the step-by-step process for collecting data from both websites and apps.

For Websites:

  1. After creating an account and property in Google Analytics, the first step is to add a web data stream to your GA4 property. This data stream establishes the connection between your website and GA4, allowing data to flow from your site to the analytics platform.
  2. Next, you need to set up the measurement code on your website. This code, provided by GA4, should be added to each site page. It collects valuable user interaction data, such as page views and clicks, and sends it to GA4 for analysis. If you have a shopify website, you can use GTM Assistant app to easily setup GA4 tracking on your website.


For Apps:

  1. Once you have an account and property set up in Google Analytics, add an app data stream to your GA4 property. This data stream enables user data collection specific to your mobile app.
  2. To integrate GA4 tracking into your app, you’ll need to add the Firebase SDK. The Firebase SDK provides the tools and libraries for tracking user interactions, events, and screens within your app.
  3. You’ll also need to add the Google Analytics for Firebase SDK to your app. This SDK works with the Firebase SDK and ensures that app data is accurately collected and sent to GA4 for analysis.

By following these steps, you can successfully set up data collection for both websites and apps, allowing you to gather valuable insights into user behavior and engagement.


B) Property Settings:

To enhance your data collection capabilities, you can enable Google Signals, which provides additional insights into users who have enabled personalized ads and signed in to their Google Accounts. Here's how you can turn on Google Signals:

  1. In the Setup Assistant, locate the row corresponding to Google Signals.
  2. Click on the Actions menu (represented by a forward arrow) on the row's right side.
  3. Select "Manage Google Signals" from the menu options.
  4. In the Data Collection section, enable the Google Signals data collection option.


Once you have completed these steps, click the Actions menu (forward arrow) again and mark the row as complete. It will update the status for all property users, indicating that Google Signals data collection has been enabled.

Enabling Google Signals allows you to gather additional data about users who have enabled personalized ads and signed in to their Google Accounts.


To track and measure valuable user actions, known as conversions, in your GA4 property, you need to set up conversions. Conversions can include various user actions, such as making a purchase, subscribing to a newsletter, or completing a form submission. Here's how you can mark an event as a conversion:

  1. In the Setup Assistant, find the row related to setting up conversions.
  2. Click on the Actions menu (represented by a forward arrow) on the row's right side.
  3. Select "Manage conversions" from the menu options.
  4. In the top left corner, click on "Events."
  5. In the Existing Events table, find the event corresponding to the user action you want to track as a conversion.
  6. Toggle the switch under "Mark as conversion" to indicate that the selected event should be considered a conversion.


If you have recently created a new event or still need to create the event, you can refer to the instructions on marking a new event as a conversion.

In GA4, you can define audiences, which are groups of users that share specific attributes. These audiences can target and market to specific user segments using advertising platforms such as Google Ads. Here's how you can define audiences in GA4:

  1. To define an audience, refer to the "Create, edit, and archive audiences" documentation. This resource provides detailed instructions on creating, modifying, and managing audiences based on various attributes and criteria.
  2. Once you have defined your audiences, you can leverage them with advertising products like Google Ads. By sharing these audiences with Google Ads, you can effectively target and market to specific user groups that align with your business objectives.


Suppose you have existing audiences in a Universal Analytics property and wish to migrate them to your GA4 property. In that case, you can use the 
GA4 Migrator for the Google Analytics Google Sheets add-on. This add-on facilitates the seamless transfer of audiences from Universal Analytics to GA4. For more information on migrating audiences, refer to the documentation and learn more about the GA4 Migrator add-on.

Linking your GA4 property to Google Ads is essential for better ad campaign tracking and optimization. The Setup Assistant will guide you through linking your GA4 property to your Google Ads account. Once linked, you can track the performance of your ads directly in GA4, gaining insights into clicks, impressions, and conversions.

It's important to link your Google Ads account with Google Analytics. By establishing this connection, you enable the seamless data flow between the two platforms, unlocking various benefits such as campaign visibility, importing conversions, and utilizing Analytics audiences for remarketing.

Here's how you can link your Google Ads account in GA4:

  1. In the Setup Assistant, locate the row linking Google Ads.
  2. Click on the Actions menu (represented by a forward arrow) on the row's right side.
  3. Select "Manage Google Ads links" from the menu options.
  4. Click on the "Link" button.
  5. Choose the Google Ads accounts you wish to link to your GA4 property.
  6. Click "Confirm" to proceed.
  7. Click "Next" to continue the setup process.
  8. It is recommended to leave the default settings enabled, but you can customize them if needed.
  9. Review your settings and click "Submit" to finalize the linking process.


Additionally, if you have existing Google Ads links in a Universal Analytics property and want to migrate them to your GA4 property, you can use the Google Ads links migration tool. This tool provides instructions on importing your Google Ads links from Universal Analytics to your connected GA4 property, ensuring a smooth transition of your advertising data.

Suppose you were previously bidding on conversions from Universal Analytics in Google Ads and want to switch to bidding on GA4 conversions. In that case, you need to update your Google Ads account. Here's a step-by-step process to help you transition smoothly:

  1. In the Setup Assistant, locate the "Bid on GA4 conversions" row and hover your mouse over the status column. It will show you the number of Universal Analytics conversions you are currently bidding on in Google Ads compared to the number of GA4 conversions.
  2. Access your linked Google Ads account(s). If you have multiple accounts linked, you must repeat the following steps for each account. You can find a list of linked Google Ads accounts inside Google Analytics.
  3. In the top right corner, click "Tools and settings" and select "Conversions" from the Measurement section.
  4. Look for conversions listed under the "Conversion source" column that is set to "Website (Google Analytics (UA))."
  5. For each of these conversions, ensure you have created an equivalent GA4 conversion and imported it into Google Ads.
  6. In your Google Analytics account, compare the volumes of the Universal Analytics conversions to their equivalent GA4 conversions. Note that the conversion volumes may not match exactly due to various factors.


Once you have validated your conversions, go to your Google Ads account and switch the action optimization for the UA conversion to "Secondary action (observe only)." In the same session, switch the action optimization for the GA4 conversion to "Primary action" by following these steps:

  1. Go to Tools and Settings > Measurement > Conversions in your Google Ads account.
  2. Find the goal, including the conversion action you want to edit.
  3. Click on "Edit goal."
  4. Next to the conversion action you wish to update, click the drop-down menu and select either "Secondary action (observe only)" or "Primary action."
  5. Click "Save changes" to apply the modifications.


If you notice significant differences in conversion counts between Universal Analytics and GA4, you may need to adjust your Analytics configuration to ensure accurate reporting.

    If you currently use Universal Analytics audiences in Google Ads and want to switch to Google Analytics 4 (GA4) audiences, you need to update your Google Ads account. Follow these steps to transition from Universal Analytics audiences to GA4 audiences:

    1. In the Setup Assistant, locate the "Target ads to GA4 audiences" row and hover your mouse over the status column. It will show you the number of Universal Analytics audiences you currently use in Google Ads compared to the number of GA4 audiences.
    2. Access your linked Google Ads account(s).
    3. In the top right corner, click "Tools and settings" and select "Audience Manager" from the Shared Library section.
    4. Hover your mouse over each audience and look for those labeled "Visitors of a page with Google Analytics tags." If you have numerous audiences, you can add a filter with the Source set to "Google Analytics (UA)" to identify Universal Analytics audiences specifically.
    5. Ensure you have created an equivalent GA4 audience for each Universal Analytics audience identified. You can create GA4 audiences manually or utilize the audience migration tool. Additionally, configure your Analytics property to send audiences to Google Ads.
    6. Validate that the GA4 audience size appears correct to you.
    7. Once you are ready to switch to a GA4 audience, apply it to the respective campaigns or ad groups where the equivalent Universal Analytics audience was previously applied.


    Moreover, by linking GA4 and Google Ads, you can leverage GA4 audiences for targeting purposes. By aligning your advertising efforts with your GA4 audience segments, you can deliver more relevant ads and increase the chances of converting users.

    D) Advanced Setup (Optional):

    The Setup Assistant also offers advanced setup options for users who require additional features and integrations. These options are optional and can be skipped if irrelevant to your specific needs. However, they can provide added capabilities and enhance your analytics in GA4.

    Some of the advanced setup options include:

    As an administrator of your Google Analytics 4 property, you can manage users and their permissions. It allows you to add, remove, and modify user access to your property and create and manage user groups for easier administration. Follow these steps to add users to your property:

    1. In the Setup Assistant, locate the specific row and click on the Actions menu, denoted by a forward arrow located to the right of the row.
    2. From the dropdown menu, select "Manage users."
    3. Within the "Property access management" section, click on the "+" button and then select "Add users."
    4. Enter the email address associated with the user's Google Account or Google Workspace account.
    5. Optionally, you can select the checkbox for "Notify new users by email" to notify the user regarding their access.
    6. Choose the appropriate permissions for the user from the available options. You can refer to the documentation to learn more about different permission levels and their capabilities.
    7. Once you have selected the desired permissions, click the "Add" button to finalize the user's inclusion in the property.


    By following these steps, you can easily add users to your Google Analytics 4 property, granting them the necessary access and permissions to analyze and manage data within the platform effectively.

    You can import additional data from external sources to enrich your analytics. It can include offline data, CRM data, or data from other marketing platforms. By integrating external data sources, you can better understand your audience and their interactions with your brand.

    BigQuery is a powerful data analysis tool. By linking your GA4 property to BigQuery, you can use more robust data analysis capabilities, allowing for complex queries and in-depth analysis of your GA4 data.

    The User-ID feature enables tracking of user interactions across devices. By assigning a unique identifier to each user, you can track their behavior as they move from one device to another, providing a complete picture of their journey and allowing for better attribution.

    The Measurement Protocol allows you to send data directly to GA4 from external systems or devices. It can be useful if you have specific data sources not natively integrated with GA4. Using the Measurement Protocol, you can ensure that all relevant data is captured and analyzed within GA4.

    Testing and Verification

    Once you have completed the configuration process, it is crucial to test and verify the setup of your GA4 property. Google Analytics provides two useful tools for this: DebugView and Real-Time reports. DebugView allows you to see the data collected in real time, making it easier to identify any implementation issues. The Real-Time reports provide immediate feedback on the collected data, ensuring that the setup functions as intended.

    Completing the Setup Assistant

    After testing and verifying the setup, return to the Setup Assistant and confirm that all the steps have been completed. Review the configuration details and make any necessary adjustments. It’s essential to ensure that all the required configurations are properly implemented before moving forward.

    Setup Assistant Marked Complete

    Conclusion

    Configuring your GA4 property using the Setup Assistant is crucial for harnessing the power of Google Analytics. The GA4 Setup Assistant can be complemented by the Google Tag Manager (GTM) Assistant, simplifying the implementation of GA4 tags. Businesses configuring their GA4 property using the Setup Assistant will benefit from accurate data tracking and measurement. Follow the step-by-step process outlined in this article, and you’ll be well on your way to unlocking the full potential of Google Analytics 4 for your business.